Table of Contents
- A Step-By-Step Guide To Unshrink Your Golf Sweater
- What Causes Golf Clothing to Shrink?
- Understanding clothing materials
- How to Avoid Golf Sweater Shrinkage
- The Right Golf Sweater Makes All the Difference
A Step-By-Step Guide To Unshrink Your Golf Sweater
If you find yourself with a golf sweater that's a wee bit smaller and tighter than it was one wash ago, here are the steps you can follow to carefully stretch it back to its original shape.
Step #1: Prepare your solution
To unshrink your golf sweater, a clean sink is ideal. Ensure it's free of any residue before filling it with lukewarm water.
Next, add a couple of tablespoons (around two, depending on the size of your sweater) of a gentle fabric softener and mix in with the water. If you're out of softener, baby shampoo, hair conditioner or wool detergent will work just fine.
Step #2: Soak your golf sweater
Now, completely submerge your shrunken sweater in the solution. This may feel counterintuitive if you're soaking a wool sweater since you shouldn't generally get it wet.
But, in this case, the aim is to get your sweater completely sodden so that the fabric relaxes and can return to its original structure.
Leave your golf sweater to soak for around 10 minutes.
Step #3: Remove excess water
Once 10 minutes have passed, drain the water from your sink.
Before you take the sweater out, gently squeeze it for a few seconds to remove the excess water. Whatever you do, don't wring the sweater as this will lead to a misshapen garment.
If any excess water remains, wrap your sweater up in a bath towel so that it's only slightly damp.

Step #4: Stretch it out
This is one of the most important steps in this entire unshrinking process.
Once you unwrap your golf sweater from the towel, lay it on a flat surface, such as a blocking mat or flat towel. You can now gently stretch and manipulate your sweater to its original shape and size. The fibres should be easy to work with at this point in the process.
Take care not to overstretch it, though.
Step #5: Drying
Once you are happy with the sweater's overall shape, lay it flat to dry, being careful when placing it so that the new shape remains intact.
It's best to dry your sweater inside if you can. If you do dry it outside, mind the breeze and don't use pegs, as they'll leave marks; something flat and heavy on each corner of the garment will do the trick.
Remember to give your sweater enough time to air dry fully before you wear it again.
What Causes Golf Clothing to Shrink?Over and above not following the instructions on your garment's care label, there are a few other reasons why clothes shrink:
|
Understanding clothing materials
The ability to unshrink clothes comes down to materials. Certain fabrics are easier to unshrink than others, with natural fibres responding best to the method we outlined previously.
Cotton blends, which are often used for golf shirts and shorts, can usually be gently stretched back to size using a warm water and conditioner soak, followed by carefully reshaping the garment.
Polyester, on the other hand, is more resistant to shrinking. However, if it does shrink, it can be next to impossible to restore it to its original shape due to the synthetic fibres.
When it comes to wool men's golf sweaters, it's possible to unshrink them, but extra care is required to avoid pilling or distortion. There is also cashmere, which ladies' golf sweaters are often made from. Unshrinking this delicate fabric requires a lot of patience and minimal heat, but it is possible.
In contrast, fabrics such as man-made elastane are very difficult to restore if they are exposed to high temperatures over time. Once they are stretched, there's no real way to get the fibres to contract again.
How to Avoid Golf Sweater Shrinkage
Keeping your bonnie golf sweater intact is as simple as following the garment's care instructions. Here's what to pay attention to:
-
Gentle washing: In most instances, it's best to hand wash your sweater, but a gentle machine wash setting is also fine. Don't wash your golf sweater unless you really need to, as it can stress the fibres.
-
Water temperature: Stick to washing your garment in lukewarm water unless a cold wash is recommended.
-
Detergents: Opt for mild detergents designed for delicate fabrics. Fabric softener is also ideal with every wash.
-
Air drying: Always air dry your golf sweater indoors if possible. If you need to dry it outside, keep it out of direct sunlight to avoid damaging the fibres.
-
Low-heat ironing: If you need to iron your sweater, a steam iron on a low setting is best. Regular irons can be a bit harsh on delicate fabrics.
The Right Golf Sweater Makes All the Difference
If you're passionate about golf, your clothing is an investment in your comfort on the course. And, by purchasing the right golf garments, you can avoid shrunken clothes altogether.
At Glenmuir, we understand the importance of quality. That's why we've spent over 130 years perfecting our craftsmanship to bring you the best quality golf clothing:
-
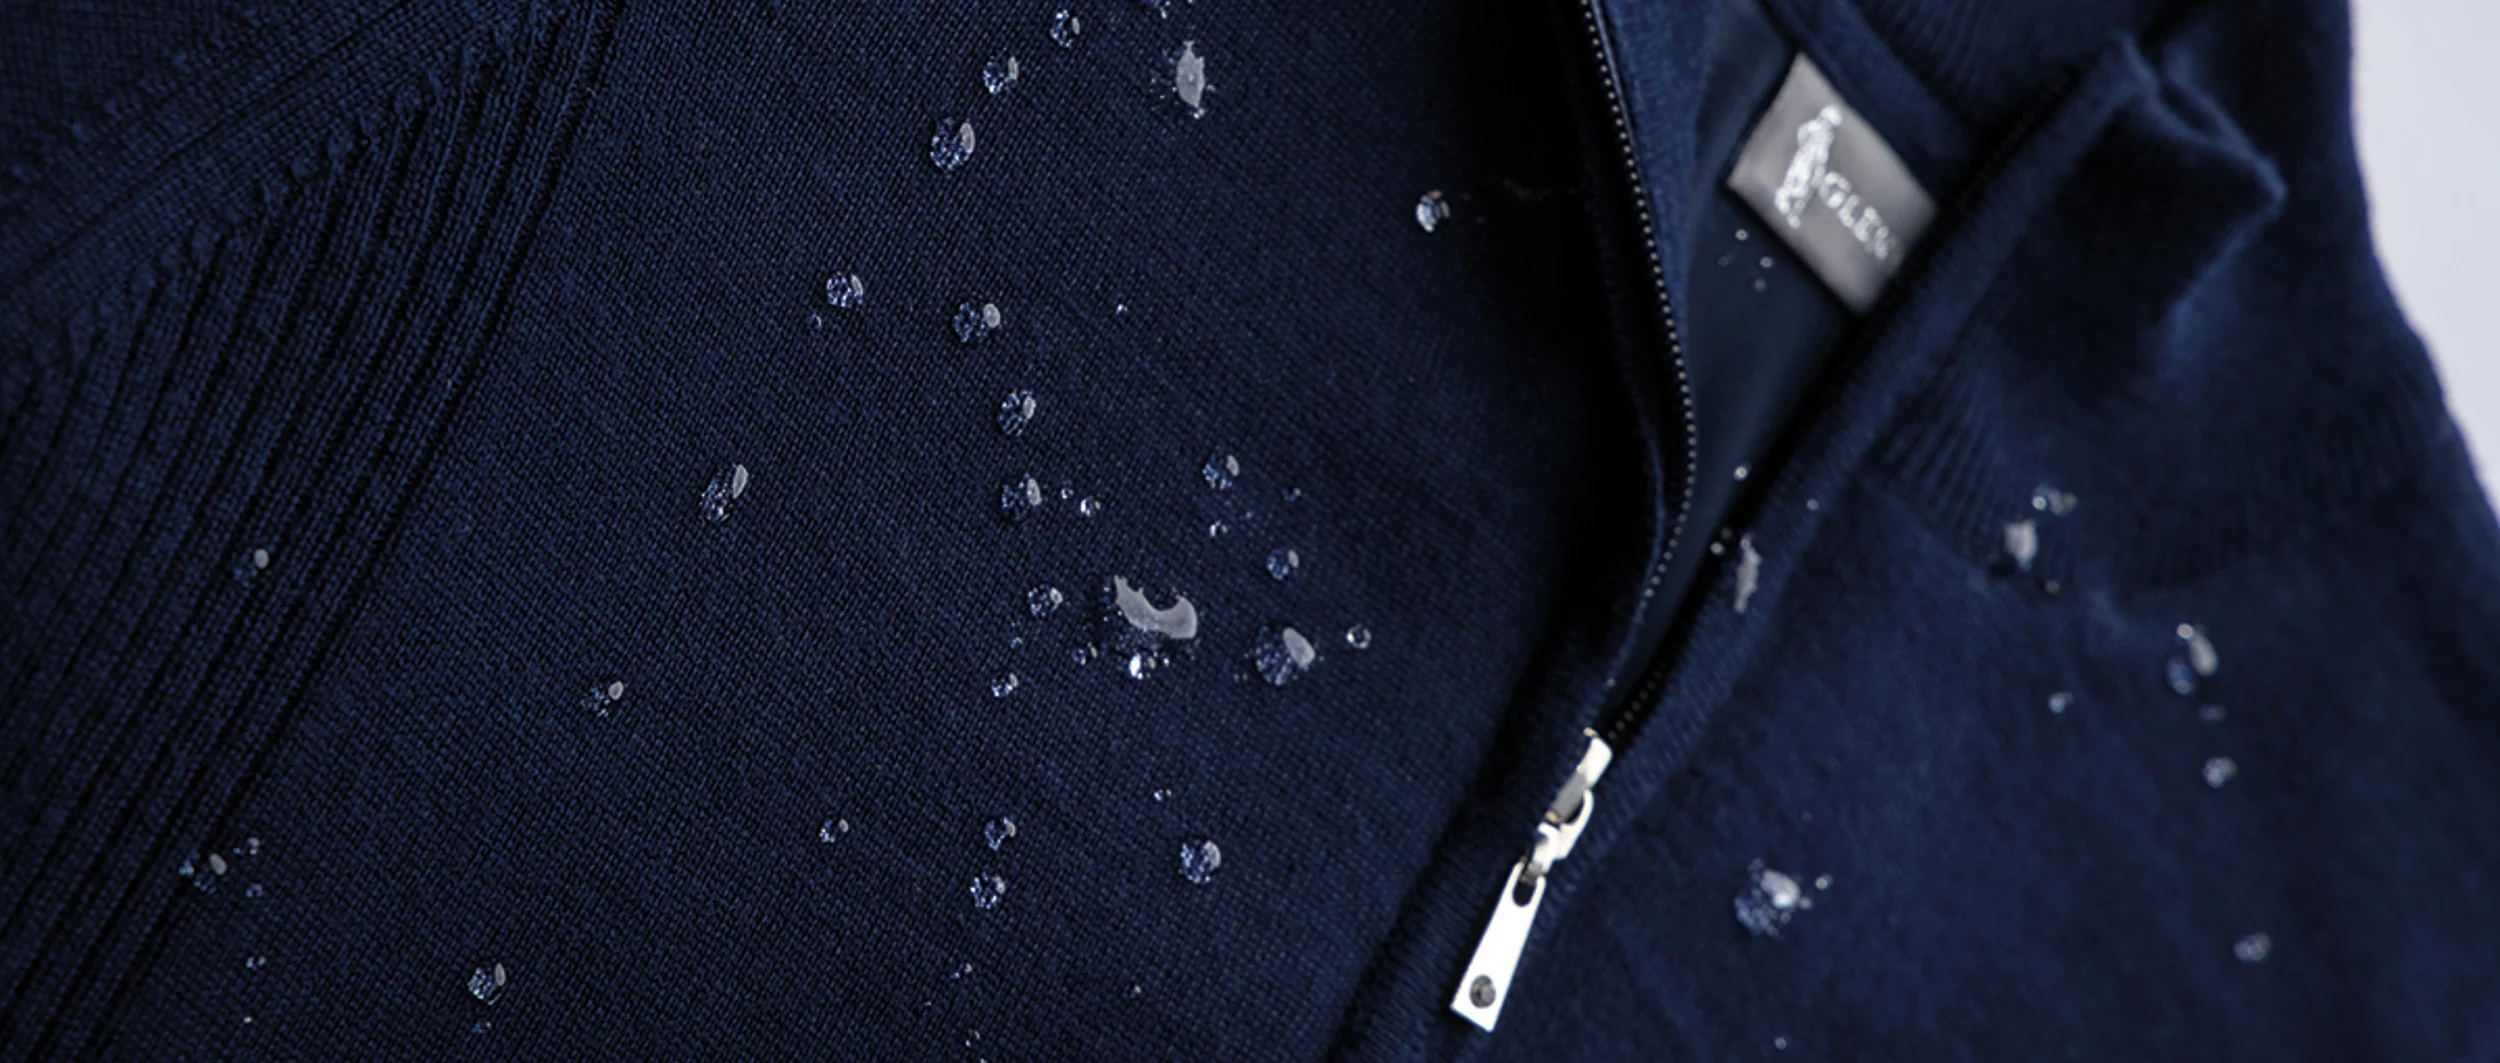
We are dedicated to ensuring our sweaters are made from only top-quality materials, like merino wool and lambswool.
-
We specially treat the fibres to stabilise yarn elasticity (how the wool stretches and recovers), which reduces shrinkage. This dedication to quality truly sets our garments apart.
-
We add elastic to reinforce welts and cuffs, which helps your clothing maintain its original shape and grip.
-
To avoid pilling, our garments are made with a signature anti-pill finish for long-lasting durability.
Experience the Glenmuir difference with our range of men's and ladies' golf sweaters.
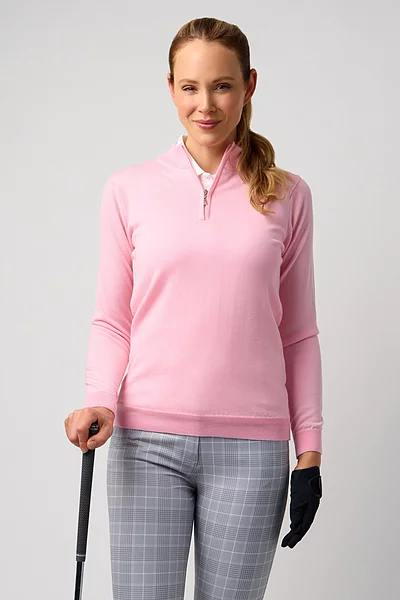
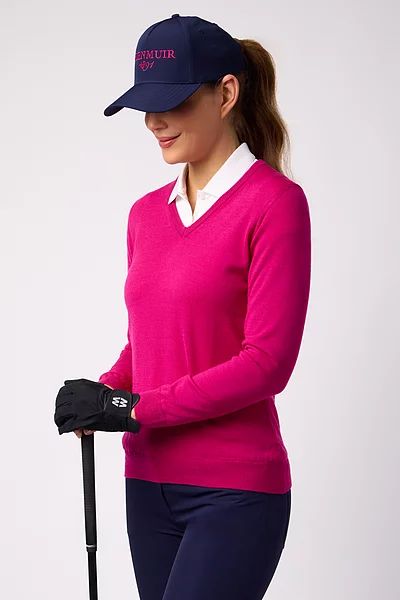
A couple of popular choices for ladies include the Quarter Zip Merino g.AMIRA and V-Neck Merino g.MAYA sweaters, both crafted with our shrinkage-resistant treatment.
For men, our best-selling Crew Lambswool g.MORAR and Quarter-Zip Merino g.JASPER golf sweaters are also excellent options that have been treated to resist shrinkage.